Posts Tagged ‘Mt Goats’

Fabric

Wednesday, February 3rd, 2010

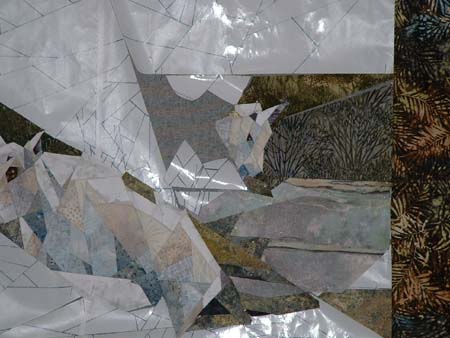
When I saw “Stonehenge” fabric by Northcott before Christmas I bought it in two colorways with the rock ledges in mind. It had subtle colorations including mossy greens that I thought would be good for this piece. However, I’m thinking it’s maybe too subtle so I will probably further fracture some of those rocks and add in other fabrics for more texture. Of course, later, the quilting will add texture as well.

Bad News, Good news

Tuesday, February 2nd, 2010

The bad news-
Normally I project my image onto newsprint and then trace it to the freezer paper. This gives me the original cartoon to aid in the placement of the pieces. This time though, remember, I skipped that step to save time and projected straight to the freezer paper. I saved a little time that day but did I ever pay for it yesterday!! There are lots of little pieces in the second kid’s face and for the life of me I could not get them to go back together right! Partly because some of the little pieces had missed getting a tic mark and partly because I had omitted the step of numbering the sewing sequence. These are very basic steps that I stress the importance of to my students so I do know better! It’s a good thing that I like jigsaw puzzles!

Consequently I did not make a lot of progress yesterday. This little guy is still missing an ear. That fabric on the edge is the piece I have been getting the eyes from. I wondered if it might also work in the borders. Hmmmm- not sure yet.

The good news-
Yesterday’s mail brought my first acceptance for 2010; news that “Just Dandy” was juried into the Mid Atlantic Quilt Festival in VA, Feb 25-28. “Just Dandy”was the one that won Best Wallhanging last summer at AQS Knoxville. And this morning I learned that SAQA’s exhibit “Points Of View” has had another venue added and will be shown at the new AQS show in Lancaster this spring. My piece, “The Old Homestead”, is part of that exhibit.

Fixing The Shadows

Monday, February 1st, 2010

It’s time to decide on the shadows, I still think the black/gray is too harsh, plus the scrap I have may not be large enough for all of the kids.

I’m liking this blue batik better and it has areas with a gray/beigey cast that may be useful. And I have LOTS of it!

It looks even better with more seams sewn. Of course now I have to un-sew the first section and replace the grays.

That done, I’ve placed it into the whole pattern up on the design wall for context.

The shadow under the jaw needs to blend better with the one on the neck but it’s coming along. I’ve also begun to lay in some of the rock ledge.

Progress

Sunday, January 31st, 2010

Pretty good progress so far. I try not to sew too much together til I’m pretty sure it’s right, so things will look better when the seams are sewn and the piece is tightened up. Some of those fabrics could still be changed. I don’t worry about changing things, the pieces are small and the waste is negligible. The majority of the time is taken up with fabric selection and cutting.

I got side-tracked yesterday and spent too much time working on a jigsaw puzzle, but hey- it is the weekend!

Catching Up

Saturday, January 30th, 2010

I spent the morning catching up on-line and went to town in the afternoon, so yesterday I didn’t have much time to sew and made very little progress. Just this little bit of shoulder.

The gray/black shadows still seem harsh for a soft baby. I think I will probably change those to something blue-er.

Gwynette, I’m so glad you beat the storm! TV pictures make it look bad. I hope your husband doesn’t loose power. We only got flurries here yesterday, but it is super cold and great weather to stay inside and sew!

Sewing, Finally!

Friday, January 29th, 2010

Prep work finished, it’s finally time for the fun part! I think I’ll start with the kid in the center. I’ve pulled fabrics that I think will work for the kids and some of the surroundings. I found a neat brown for the eyes that already have some built in “sparkle”.

I’m not really liking the black/gray deep shadows on the kid but will leave it for now and see if it works better as more color gets added.

This foliage is too dark.

This may be too bright.

I like this one better, at least for now.

I make lots of changes as I go so try not to sew too much together until I’m pretty sure it’s OK. But still, I will un-sew if I need to! A little color is starting to bring it to life.

The neatly folded fabric that I started with didn’t stay that way for long!!

More Prep

Thursday, January 28th, 2010

After the lines are all traced each one needs to be marked. I like for the tic marks and seam intersection x’s to all be in a different color for each seam line. This helps enormously when it comes to sewing it all together! The highlighter lines define the edges of sections.

Disaster in the water garden pond! The water level dropped drastically and the pump was sucking air! Thank goodness we noticed in time to save it. And double thanks that the weather was decent yesterday, actually very good for January in the mid 40’s. But still cold to be messing around with rocks and water. And ice. Removing large rocks revealed that mice or something had chewed big holes in the rubber liner! We had to use a hair dryer to unfreeze enough to get the bottom rocks loose and free up the liner enough to pull it up over some cement blocks for a temporary fix. This caused the holes to be above the level required to run the pump so we were able to refill the pond to that level and save the fish. Traps are set for the mice or whatever, and we hope that everything holds til spring!!

The snowdrops are up!

Prep-Continued

Wednesday, January 27th, 2010

When the tracing is done, I use the printer setting of  “fill the page” to make a copy because I like to work in the 8.5 x 11 size. At this point, I adjust seam lines if needed with the understanding that more changes can and will be made during the sewing process. I may want to further divide sections or even eliminate some of the seams, depending on the fabrics chosen. I have some fabrics already in mind but final selections can not be made until I have the full size pattern and scale of the piece.

The printout is such a jumble of lines at this point that I sometimes use colored pencils to help sort things out.

A clear overhead projection sheet is taped in place over the printout and all of the lines are traced for the projection transparency. I use a fine marker for this as the projection will make them bigger.

I need to decide the size desired for the finished work and prepare the newsprint or freezer paper to project to. This time I’m skipping the newsprint and going straight to using freezer paper which is pinned up on the design wall paper side out. The prepared transparency is reversed and taped in place on the projector and adjusted to fill the paper. I want this piece to finish at about 40″ so I prepared my paper to be 43″ wide. The length of the piece will be whatever it turns out to be after the tracing is finished. the extra 3″ are for the shrinkage caused by the machine quilting later.

It took over an hour to trace all of the lines. Even with a step stool my arms are killing me!

Preparing The Pattern

Tuesday, January 26th, 2010

The first step after choosing the image is preparing the working pattern which will eventually be on freezer paper. I use a very transparent tracing paper available from an art supply store layered over the photo – in this case, the printout of the photo, and determine where the seam lines will go. My last piece “Spring Burning” was done with curved seams, but this time I have decided that I will use only straight seams.

I can see already that this will need some tweaking. The seams have to divide obvious images, colors, etc, but they also have to be in “sewable” sections, so I will do some revising as I know it can be made easier to sew. Good prep takes time, but it is worth it!

New Project

Monday, January 25th, 2010

I’ve been very busy tying up loose ends and dealing with the paperwork end of things. The books are caught up and the sales tax deadline met. I got my entry off in time for the Mid-Atlantic Quilt Festival. Actually so far I have made five entries for this year already!

So now I am ready to start the next project and I think that I will try to document it’s progress through daily step by step reports on this blog! Well that’s the plan anyway, we’ll see if I can actually keep up!

This new project is is for the Topeka Art Guild, for an exhibit called “Inspirations” in the fall. The concept is that the artists will pair up with a member who is a photographer and make an artwork inspired by a photograph. The photograph and the artwork will hang together in the exhibit. My photographer is Tammy Patterson and the photograph is of three Mountain Goat kids that she took in Colorado last year. Tammy has some wonderful animal photos that really appealed to me and made choosing hard! Of course her work is copyrighted so she signed a release for me so that I can legally use her work and show/sell the resulting piece.

Tammy calls this “Three’s Company”.  I’m leaning towards “Colorado Kids”. This photo is of the computer printout of Tammy’s photo, so being that it is several times removed from the original I think it is pretty good and gives you an idea of where I am going. I’m excited! More tomorrow!